Connecting Your Health Records with Identity Verification
This guide explains how to connect your health records using identity verification with CLEAR or ID.me.
#How It Works
This connection method uses a nationwide network that allows you to access health records from multiple healthcare providers and facilities at once. Rather than connecting to each provider separately, the system searches across participating facilities to find all your health records in one place.
Coverage: 72,000 and growing healthcare facilities across the United States, including hospitals, clinics, and health systems.
#Supported Identity Verification Providers
You can verify your identity using either CLEAR or ID.me, depending on which identity providers are offered:
#CLEAR
CLEAR is a biometric identity verification service used at airports and stadiums. If you already have a CLEAR account, the verification process is faster.
What you'll need:
- Valid government-issued photo ID (driver's license, passport, or state ID)
- Smartphone or computer with a camera
- Email address and phone number
First-time setup: 3-5 minutes
Returning users: About 90 seconds
#ID.me
ID.me is a trusted identity verification service used by many government agencies, including the IRS, Social Security Administration, and state unemployment offices.
What you'll need:
- Valid government-issued photo ID (driver's license, passport, or state ID)
- Smartphone or computer with a camera
- Email address and phone number
First-time setup: 5-15 minutes
Returning users: Less than 1 minute
Tip: If you've already verified your identity with CLEAR or ID.me for another service, you can reuse that verification. The process will be much faster.
#How to Connect: Step-by-Step
#Step 1: Choose Your Identity Provider
When you reach the identity verification screen, you'll see options for CLEAR and/or ID.me. Choose the one you prefer or already have an account with.
- Click the ID.me button (green) or CLEAR button (dark blue)
- A new browser window will open for identity verification
Important: Do not close the original window. You'll return to it after verification is complete.
#Step 2: Create Account or Sign In
If you already have an account:
- Sign in with your existing CLEAR or ID.me credentials
- You may need to verify with two-factor authentication
If you're new to the service:
- Enter your email address and create a password
- Verify your email address
- Provide basic information (name, date of birth, address)
#Step 3: Verify Your Identity
The identity verification process typically includes:
- Upload photo ID - Take a picture of your driver's license, passport, or state ID
- Take a selfie - Use your device's camera to take a photo of your face
- Biometric matching - The service compares your photo ID to your selfie
- Document authentication - The service verifies your ID is legitimate
This process meets IAL2 (Identity Assurance Level 2) standards, which means it provides a high level of confidence that you are who you say you are. This is the same security level used by government agencies.
#Step 4: Automatic Redirect and Record Search
After successful verification:
- You'll be automatically redirected back to the original window
- The system will search for your records across participating facilities
- You'll see a loading screen while your identity is confirmed and facilities are found
- This typically takes 1-3 minutes
#Step 5: Review Connected Facilities
Once the search completes:
- You'll see a list of healthcare facilities where your records were found
- Some facilities may require additional sign-in with your existing patient portal credentials
#Additional Sign-In for Specific Facilities
After identity verification completes, you'll see your results showing which facilities have your records. Some facilities are automatically connected, while others require an additional sign-in step.
#What You'll See: Results Screen
The results screen shows:
- Facilities requiring additional sign-in (marked with ⚠️) - These need your patient portal credentials
- Connected facilities (marked with ✓) - These are already accessible and show the number of records found
- Skip and continue option - You can choose to skip facilities requiring sign-in and only use the connected ones
#Why Do Some Facilities Require Additional Sign-In?
While your identity has already been verified through CLEAR or ID.me, some healthcare facilities require you to:
- Sign in with your existing patient portal username and password
- Grant explicit consent to share your records through their system
- Select which specific data types you want to share
This additional step ensures you have direct access to your patient portal at that specific facility and gives you control over what data is shared.
#Step-by-Step: Additional Sign-In Process
When you click Sign in next to a facility, here's what happens:
1. Patient Portal Login
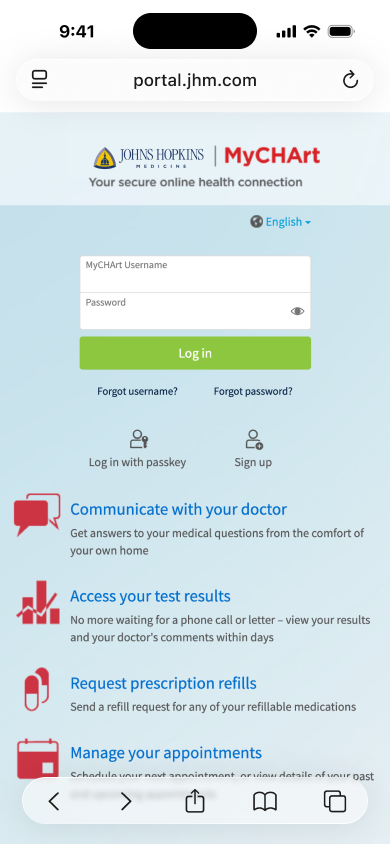
You'll be redirected to the facility's patient portal (like Epic MyChart) where you need to enter your patient portal username and password.
2. Consent to Share with Flexpa
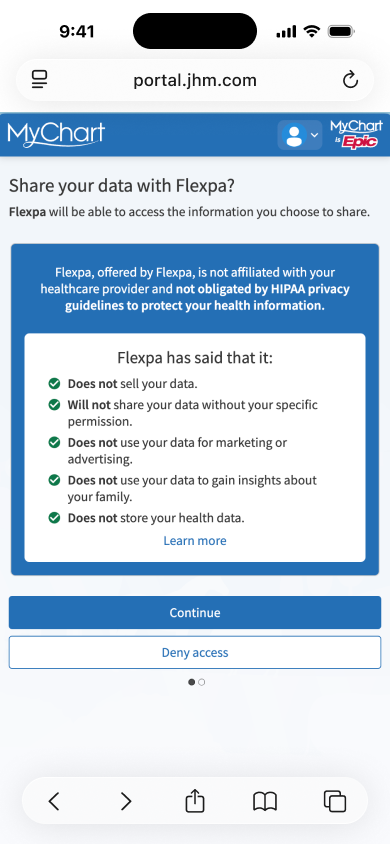
After logging in, review Flexpa's commitments and choose to continue or deny access.
3. Select Data to Share
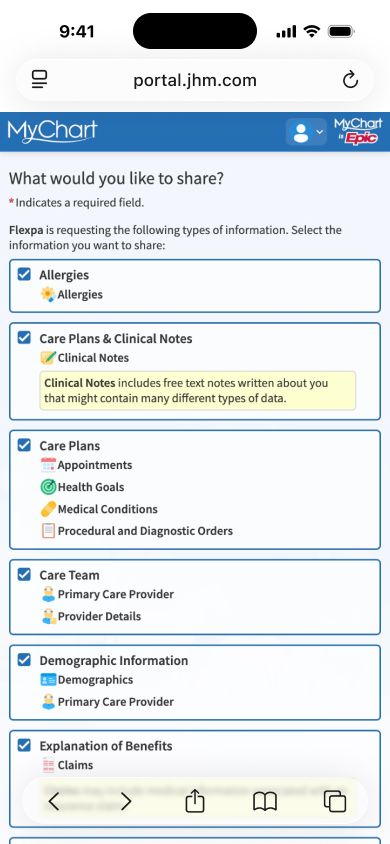
Choose which types of health information to share. All categories are selected by default, but you can uncheck any you don't want to share.
4. Confirm Your Selection
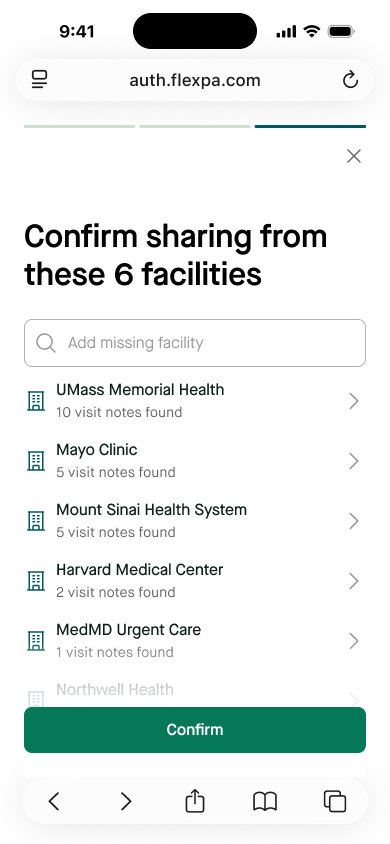
Finally, review all facilities you're sharing records from and click Confirm to complete the connection.
Important: Use your patient portal credentials for the specific facility, not your CLEAR or ID.me login. Each healthcare facility has its own separate patient portal system.
#Privacy and Security
Yes. Both CLEAR and ID.me are:
- Trusted by government agencies and major corporations
- HIPAA compliant for handling health information
- SOC 2 Type II certified for data security
- Subject to regular third-party security audits
- Your identity verification is stored securely by CLEAR or ID.me
- The healthcare application receives only confirmation of your verified identity
- Your photos and ID scans are encrypted and protected
- You can delete your CLEAR or ID.me account at any time
#Can I revoke access later?
Yes. You can revoke access to your health records at any time through:
- The application you connected to
- Your MyFlexpa dashboard (if available)
- Contacting the application's support directly
#Need More Help?
If you're still having trouble, check out our other patient resources:
Download Step-by-Step Guides:
#Additional Resources